Tracking outbound link clicks in Google Tag Manager is streamlined using the Auto-Event Variable configuration.
Auto-Event Variable
Auto-Event variables access the target element of an automatic event (e.g., Click, Error, Form Submit). When configuring, you must specify the required element component:
- Element: Accesses the DOM element itself (stored as
gtm.elementin the Data Layer). You can create custom variables to traverse the DOM, such asgtm.element.parentElement.idto fetch a parent’s ID. Note: Built-in variables like Click Element and Form Element serve the same purpose. - Element Classes: Returns the
classattribute (gtm.elementClasses). Equivalent to the Click Classes built-in variable. - Element ID: Returns the
idattribute (gtm.elementId). Equivalent to the Click ID built-in variable. - Element Target: Returns the
targetattribute (gtm.elementTarget). - Element Text: Returns the
textContentorinnerTextof the element. The value is trimmed and normalized for cross-browser consistency. - Element URL: Returns the
hreforactionattribute (gtm.elementUrl). You can further parse this to access specific URL components. - History New/Old URL Fragment: Captures the URL fragment (hash) before or after a browser history change (
gtm.newUrlFragment/gtm.oldUrlFragment). - History New/Old State: Returns the state object from history events (
gtm.newHistoryState/gtm.oldHistoryState). - History Change Source: Identifies the event that triggered the history change (
popstate,pushState,replaceState, orpolling).
Returns
The variable returns the value of the selected component. If no auto-event is active, it returns the specified default value or undefined.
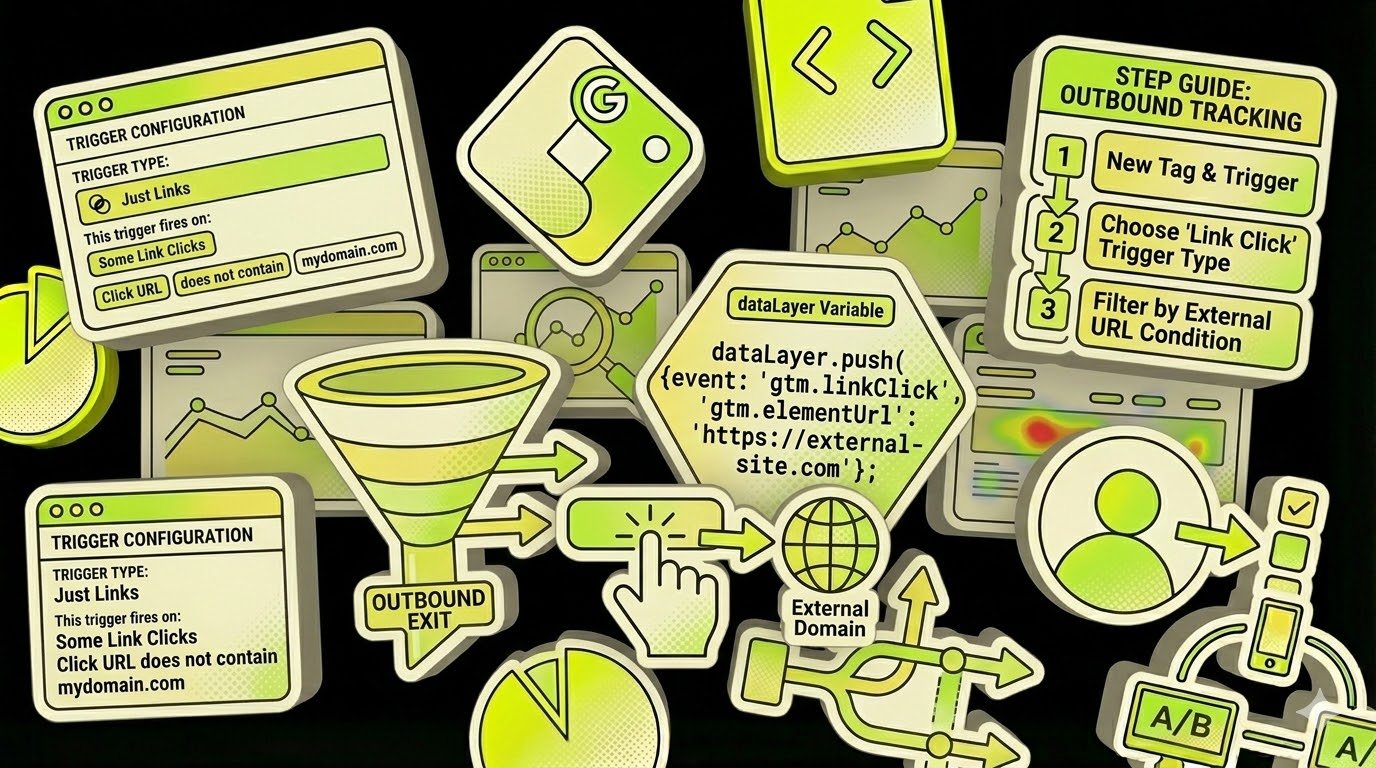
Tracking Outbound Links via Auto-Event Variable
This method utilizes the Element URL variable type. While it typically returns the href, the Is Outbound component type automates external link detection.
The variable returns true if the clicked link’s domain differs from the current domain, and false otherwise. This allows for precise triggering in Just Links triggers.
Implementation Steps
Step 1: Create the Auto-Event Variable
- Navigate to Variables > User-Defined Variables > New.
- Select Auto-Event Variable as the template.
- Select Element URL as the Variable Type.
- Set Component Type to Is Outbound.
- Affiliated Domains: Enter a comma-separated list of domains (e.g., your blog or subdomain) that should be treated as internal.
- Name the variable (e.g.,
Outbound Link Check) and save.
Step 2: Create the Just Links Trigger
- Navigate to Triggers > New and select Click – Just Links.
- Enable Wait for Tags and Check Validation for better reliability.
- Set the trigger to fire on Some Link Clicks.
- Define the condition:
Outbound Link Checkequalstrue.
Once configured, any tag associated with this trigger will execute only when a user clicks a link leading to an external domain.
Technical Requirement
The href attribute must contain a valid URL. Non-standard links, such as mailto: or javascript:void(0), are not classified as outbound links by this variable.
Leave a Reply